3. Verber Payments
Setup your Payments profile to start accepting payments from your Verber Profile page.
Verber Payments allows you to accept payments from your customers using your Verber Profile's My Services feature with Select to Book button on each service. You can access your Verber Payments details from your Verber Dashboard after you have signed-in to Verber. Once you have setup and completed your Payments account details, you can start accepting payments and get paid!
3.1 Setup your Payments account
Follow these steps to setup your Payments account:
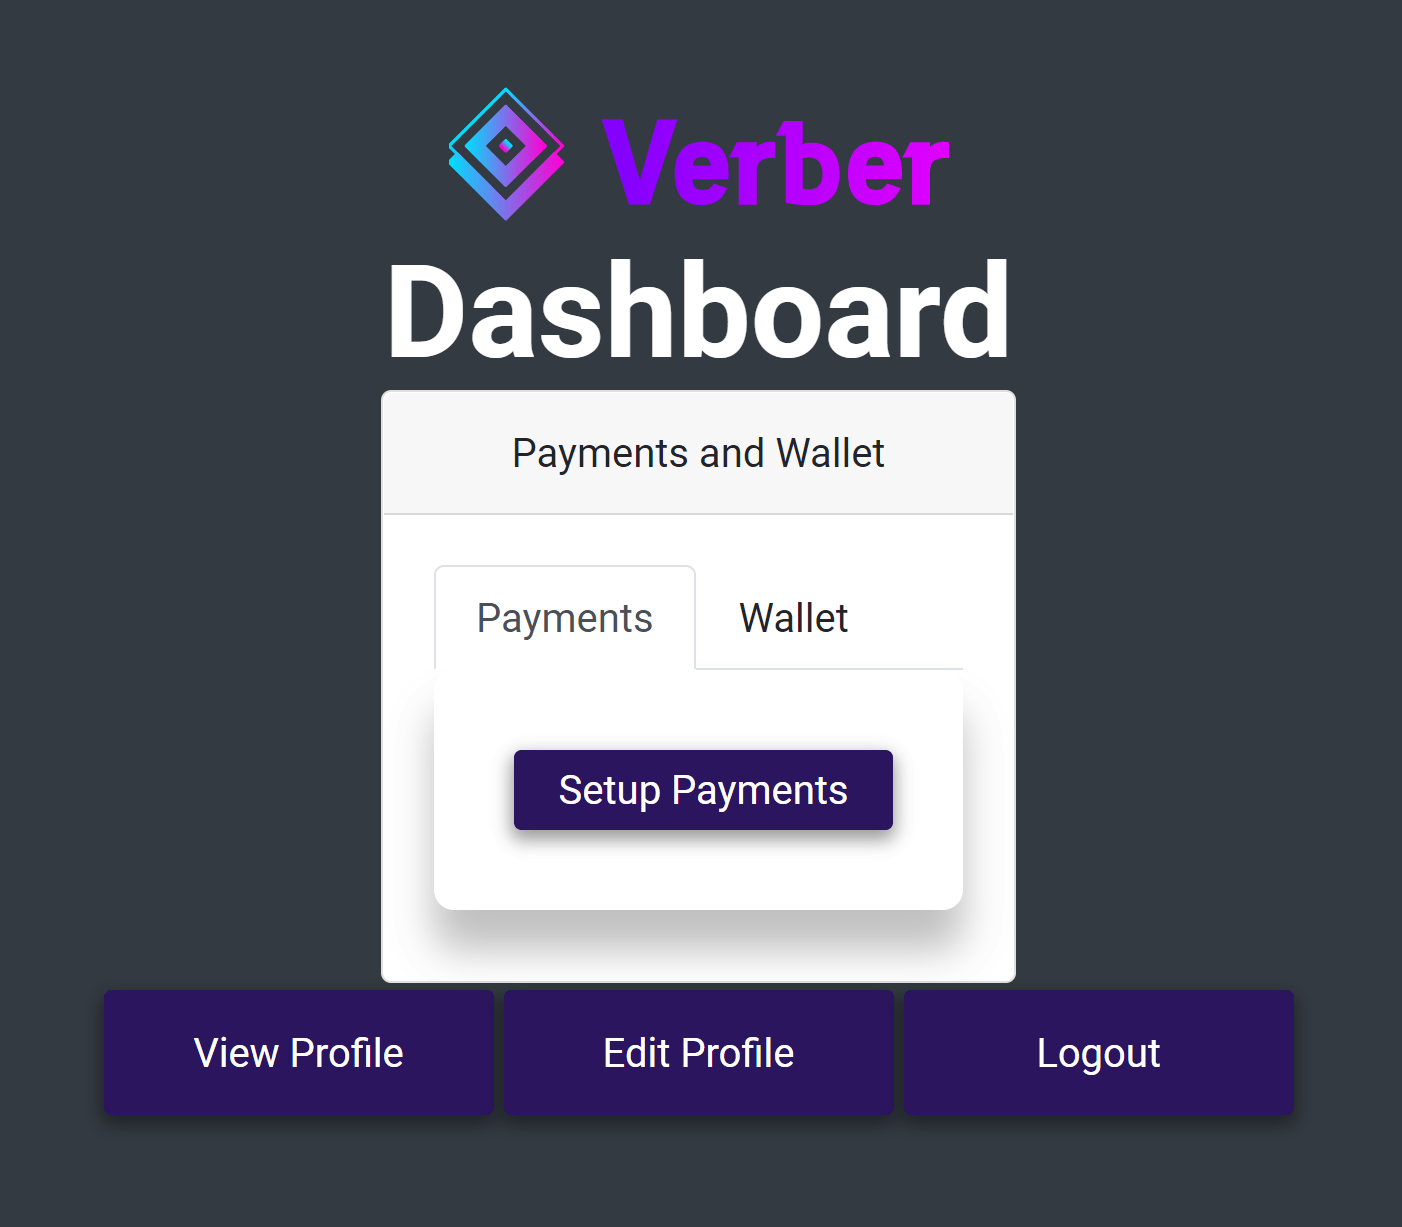
- Go to your Verber Dashboard and click on
Setup Payments:
Note:
- If you started setting up your Payments account but did not complete the process, you will see a Complete Payments Setup button instead of Setup Payments button. Click on the Complete Payments Setup button and continue to finish your account setup.
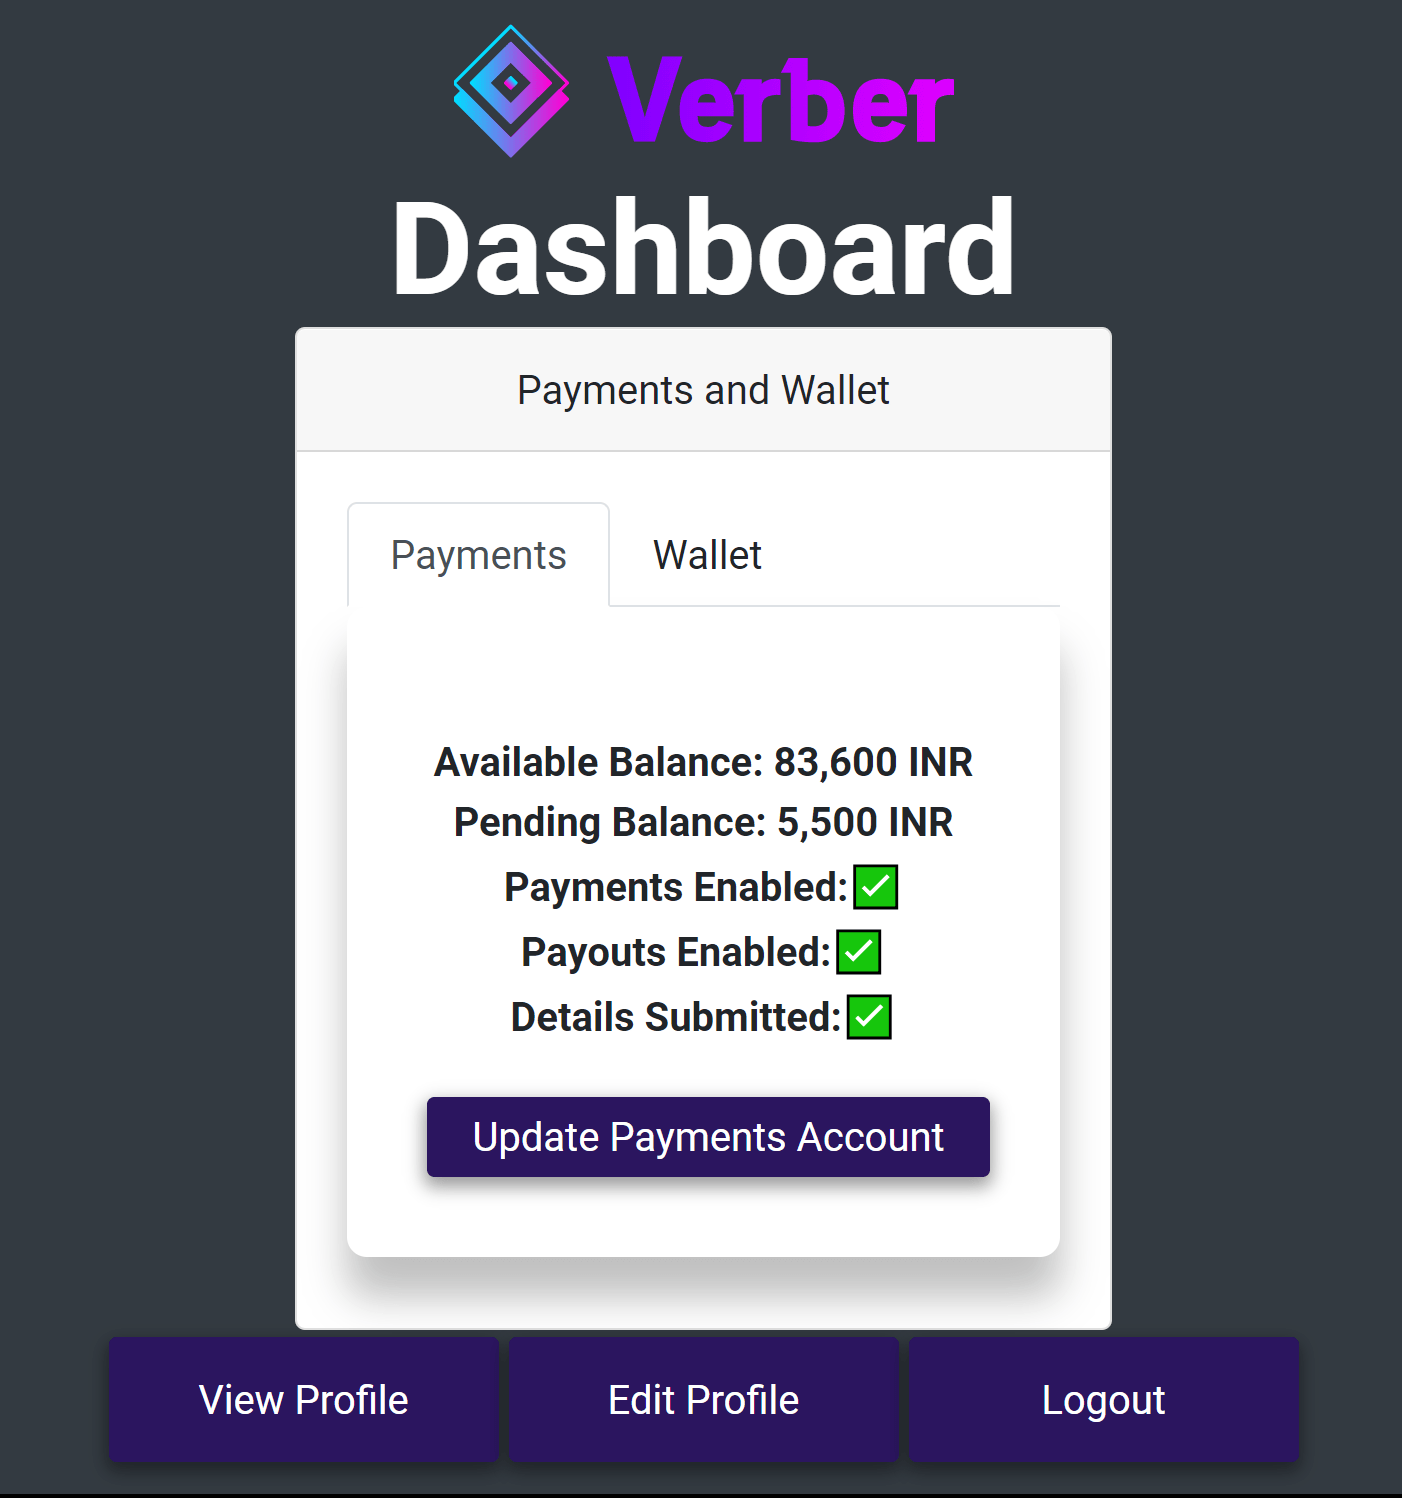
- If you have already completed Payments setup, you will see your account and balance details an option to Update Payments Account button instead of the Setup Payments button. You can skip the following steps!
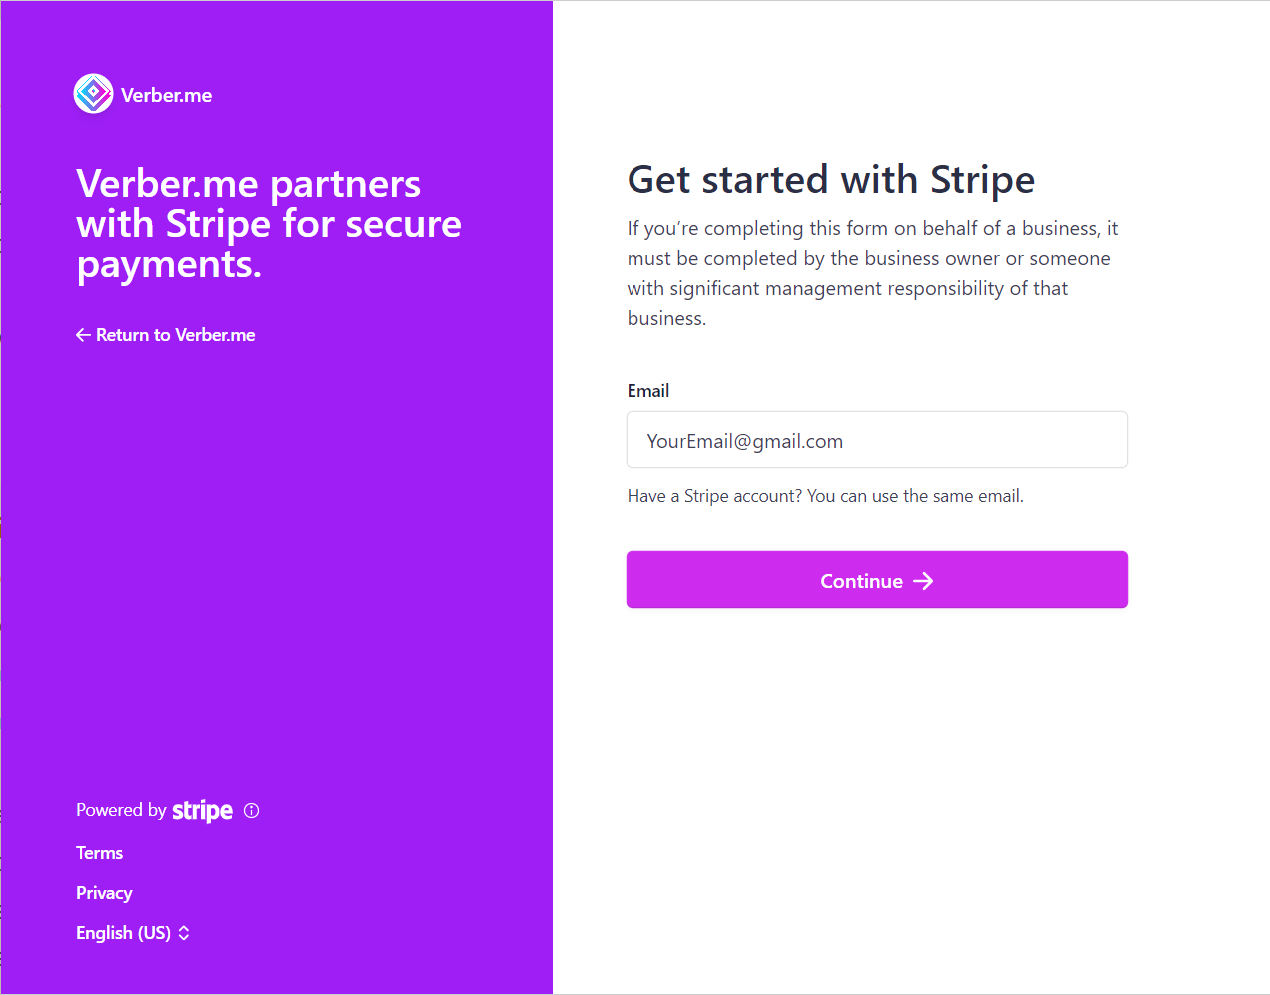
- Wait until you are redirected to the Payments setup page where you can create or connect your existing Payment account. Your email ID will be pre-filled in the Email ID field. Click on Continue to proceed:
- Follow the prompts and fill out all the details until your payments account setup is complete. Once you have completed, you will be redirected to your Verber Dashboard and you will see your Payment Account status on the dashboard along with a link to update your Payment Account details when needed as shown below:
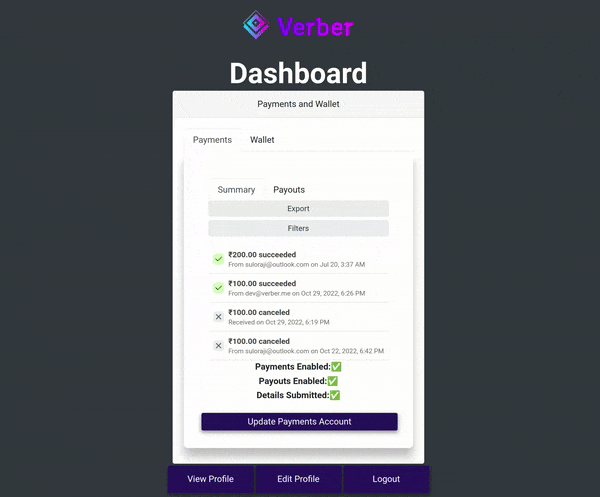
3.1.1 Your Payments Summary on Verber Dashboard
From your Verber Dashboard, you can see the summary of your Payments by clikcing on Payments > Summary.
You can also see the Payouts separately by clicking on the Payments > Payouts button.
See the following GIF demonstrating the both the options:
3.2 Accept payments from your customers
Once you have setup your Payments account, you can start accepting payments from your customers and audience using your Verber Profile's Book Me feature.
Set your availability using Edit Profile button on Verber Dashboard (tutorial for availability setup is here).
When a customer chooses a time slot on your Verber Availability Calendar, they will get an option to book that time slot by paying you:
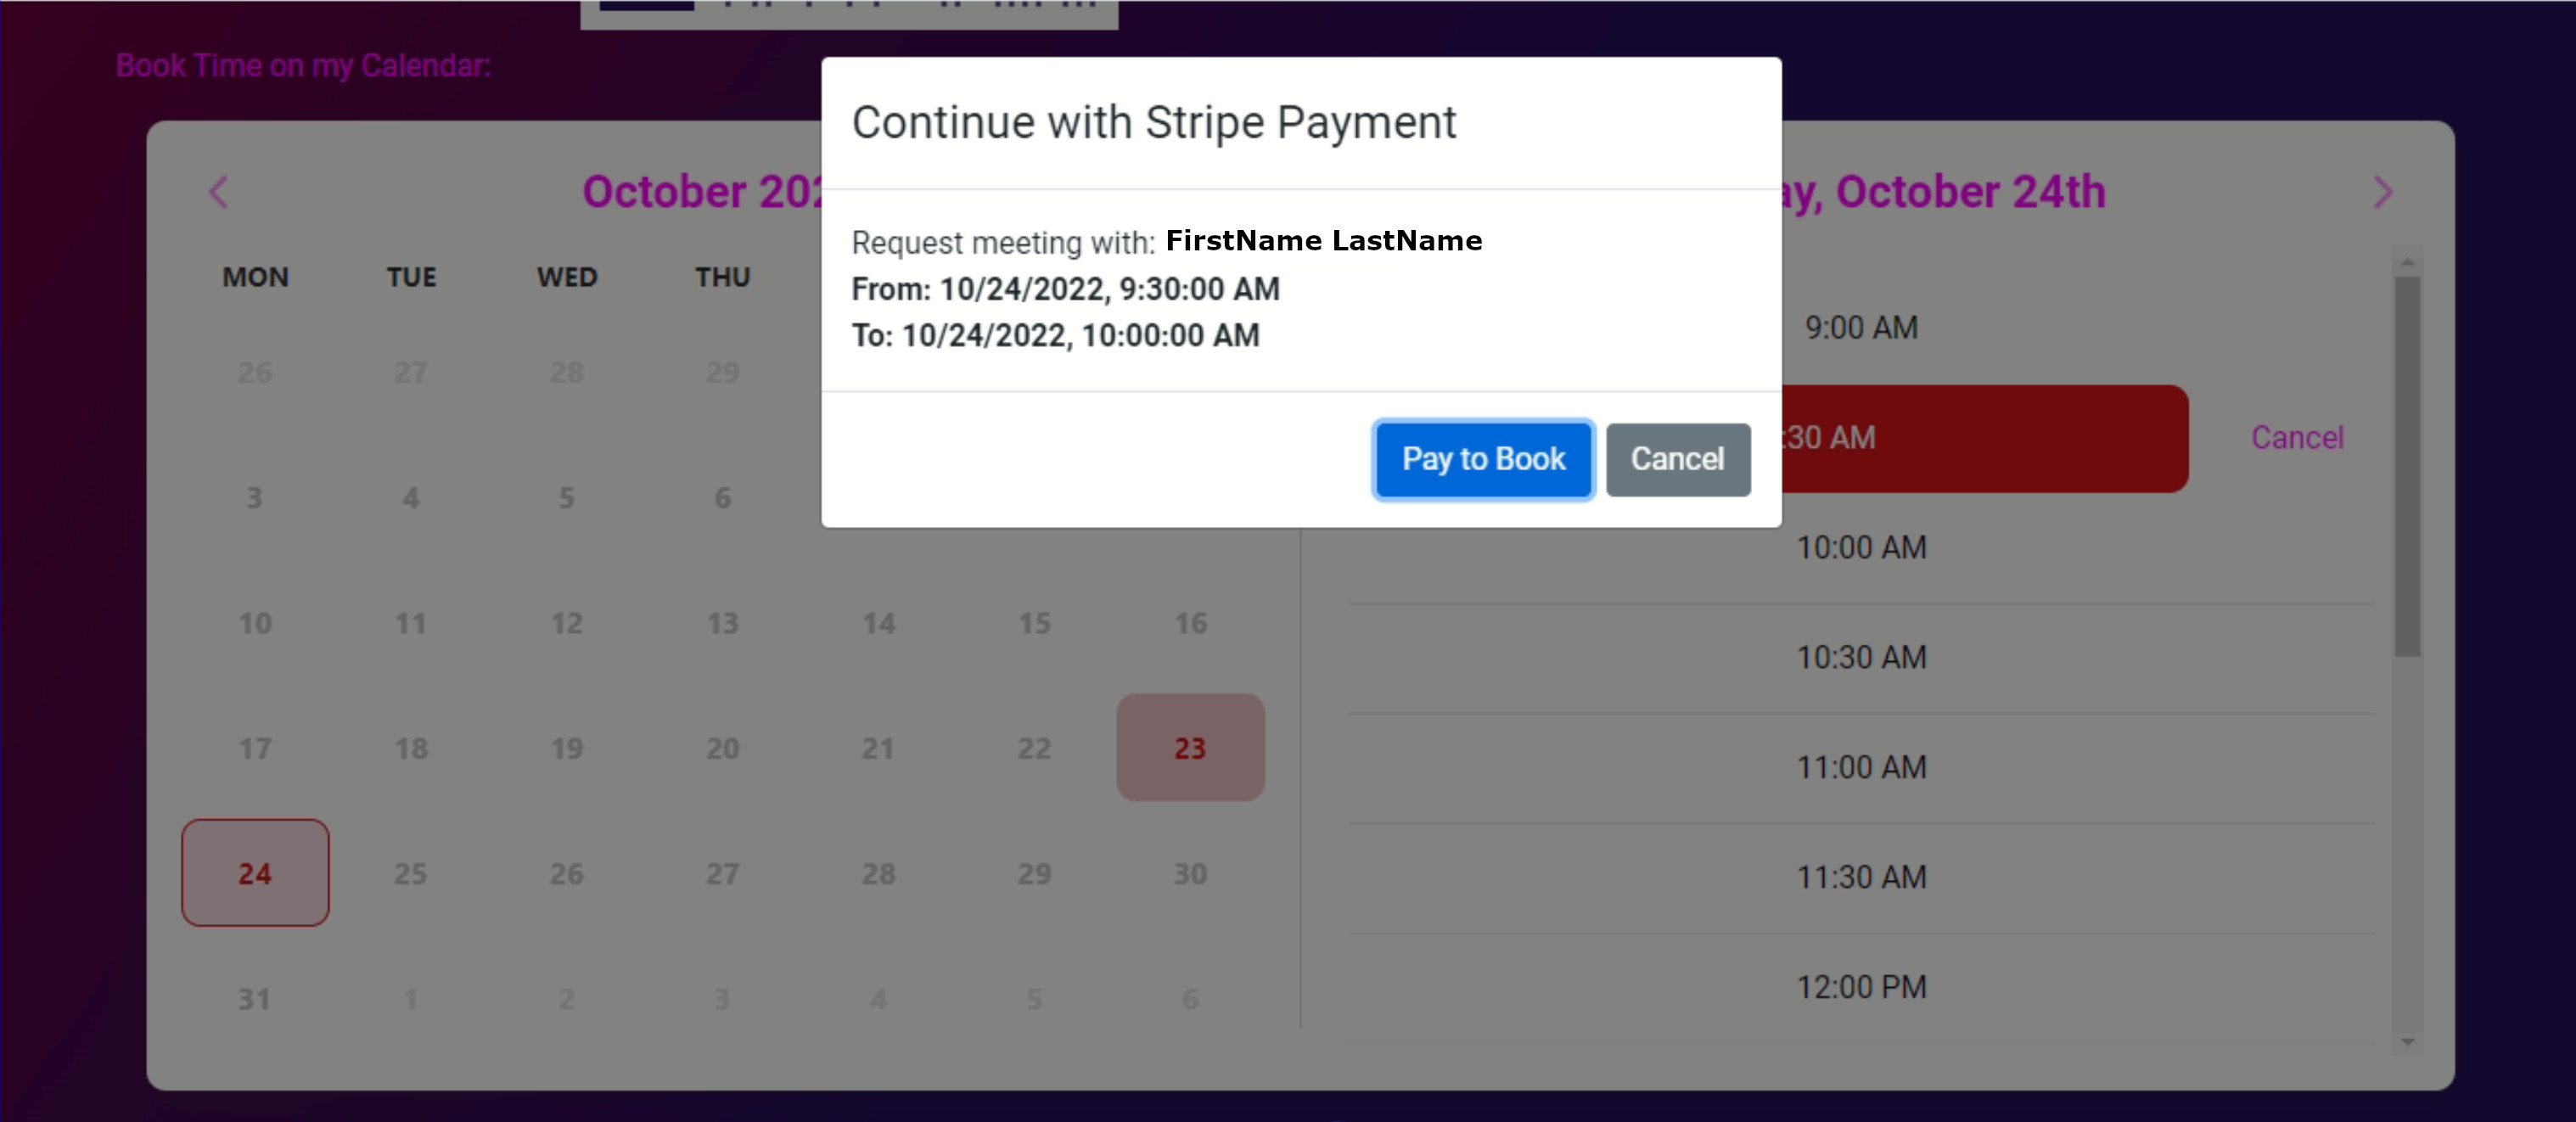
When they click on Pay to Book, they will be redirected to a payment page to make a payment to your Payments account to complete the booking:
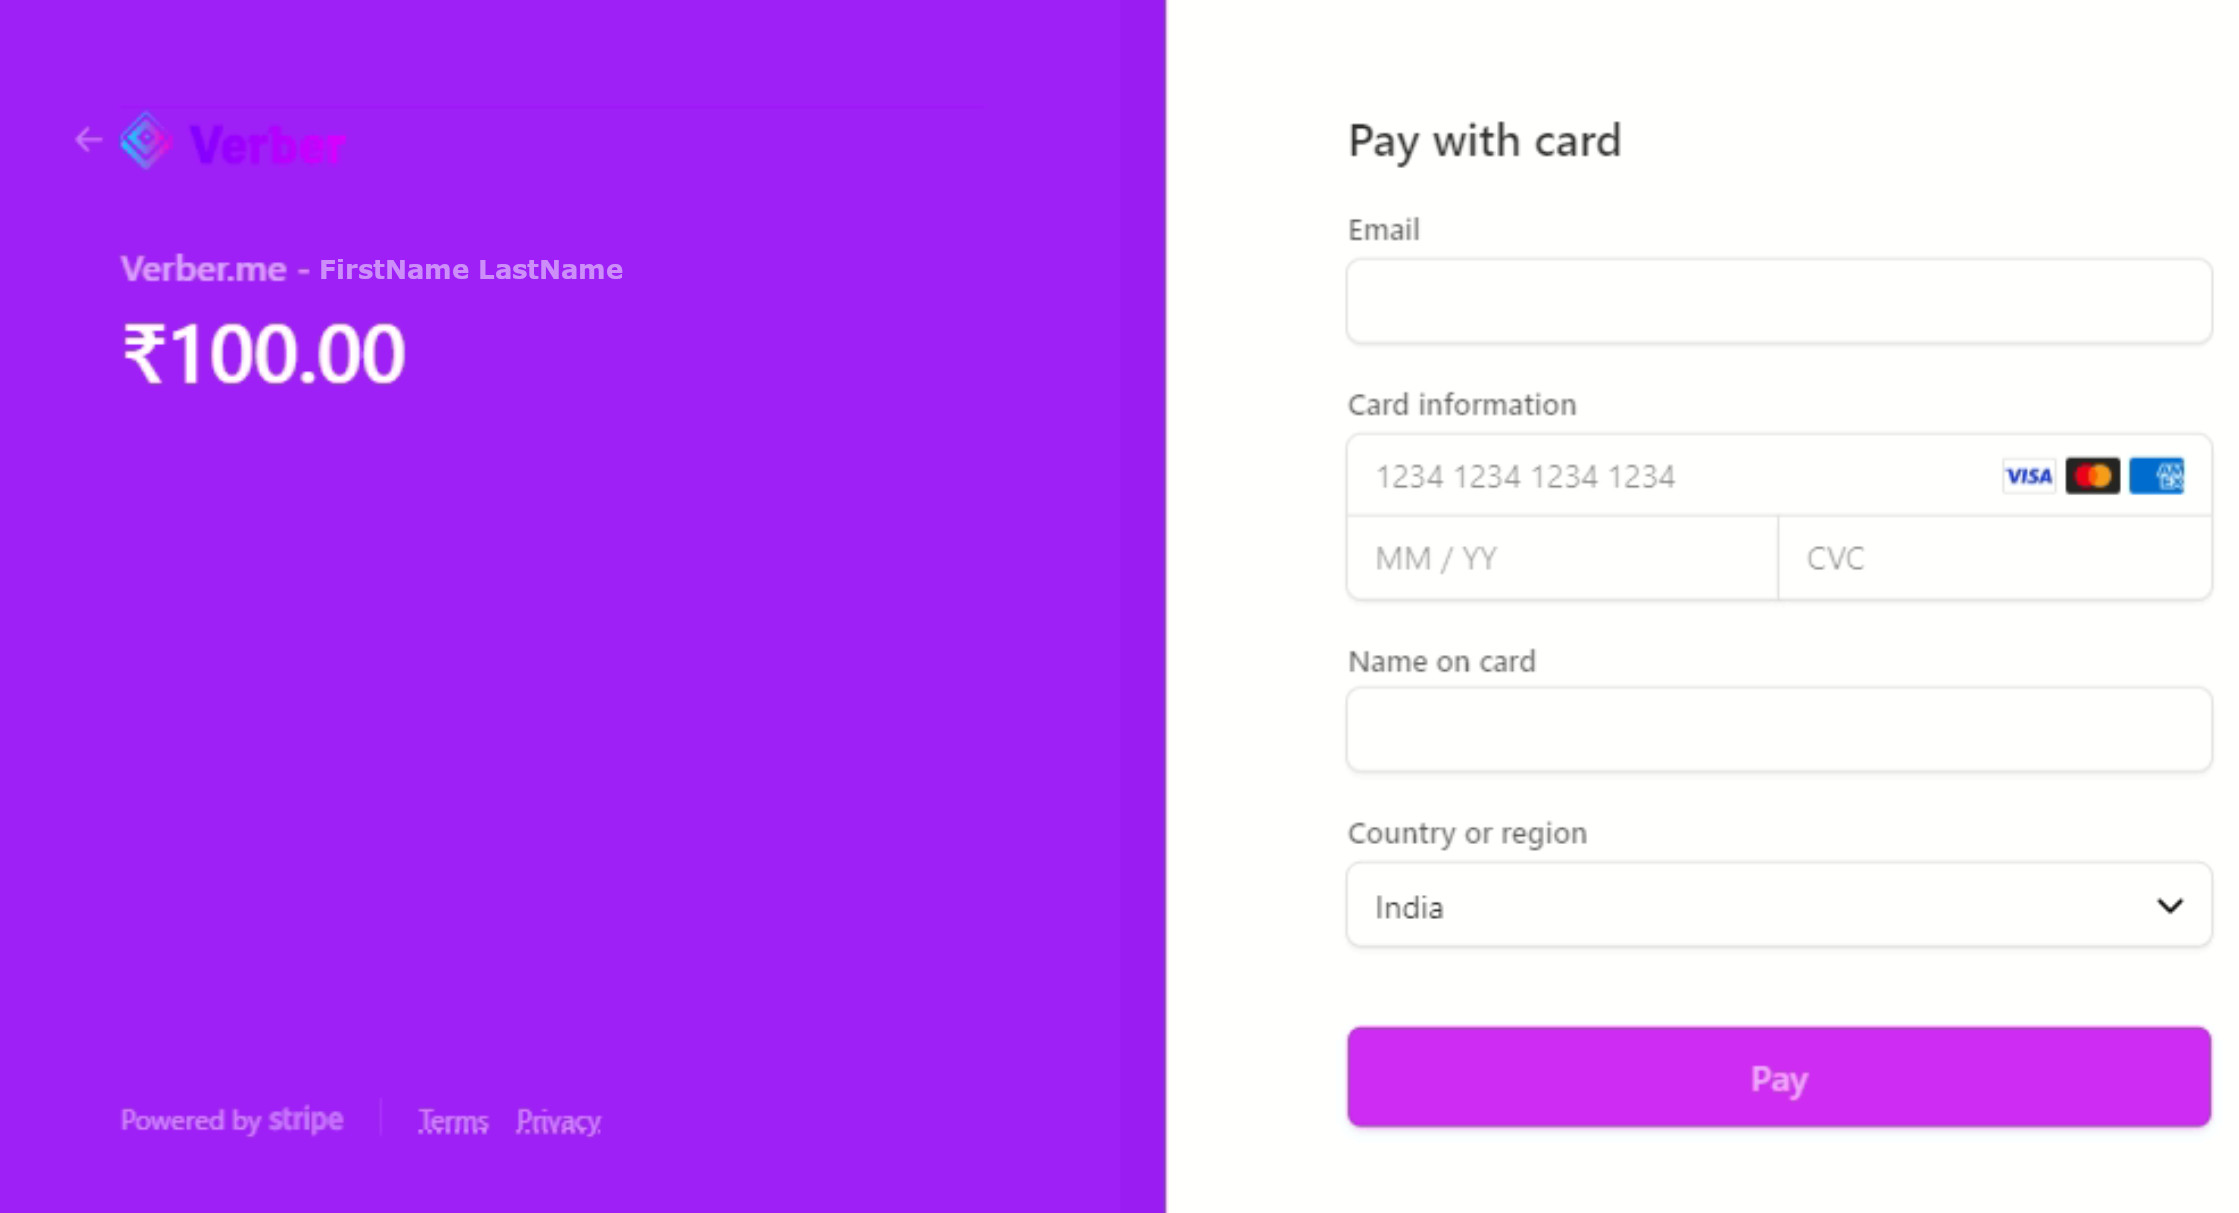
Once the payment is complete, the customer will be redirected back to your Verber Profile page and the slot will be booked.
3.3 Additional Details
3.3.1 Setup your Booking Fee
The Booking fee is the amount you charge your customers for booking a time slot on your Verber Availability Calendar. You can set your Booking Fee and Currency from your Verber EditProfile Page as shown below:
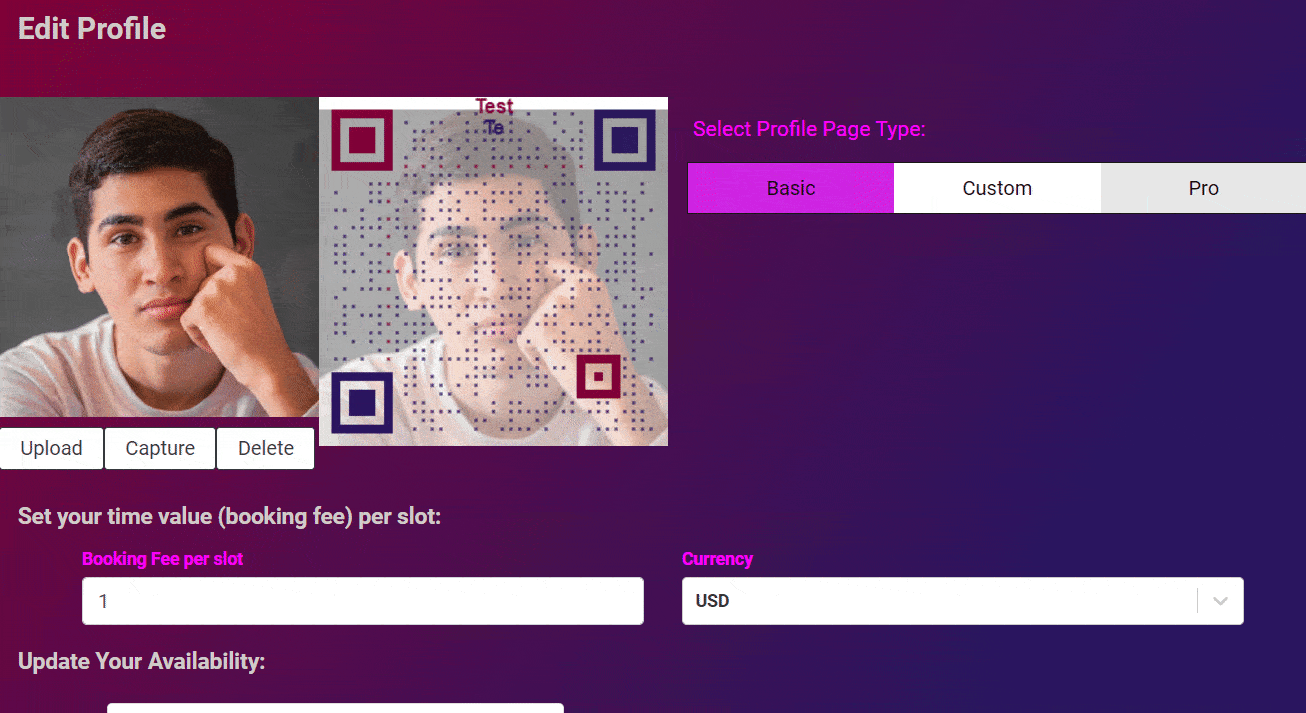
Note: The minimum Booking Fee you can charge is 0.5 USD or 100 INR. There is no maximum limit on the Booking Fee you can charge.
Note: You must have a valid Payments account setup to set your Booking Fee. If you do not have a valid Payments account setup, you will see a message on your
Edit Profilepage to setup your Payments account like this:
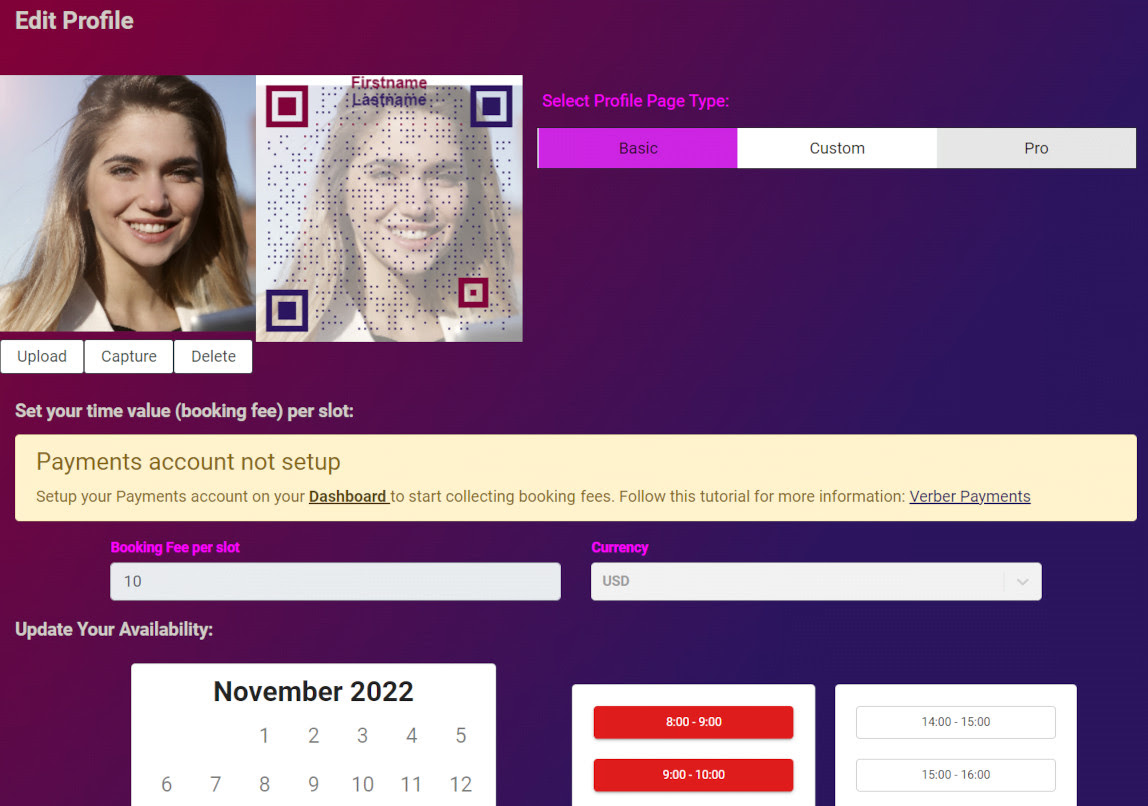
Follow the tutorial above to setup your Payments account and then come back to set your Booking Fee.
3.3.2 Terms of Use
You consent to connect your Stripe account to Verber.me to receive/process payments.
3.4 Next Steps
Now that you have setup your Payments account, you can start accepting payments from your customers and audience using your Verber Profile's My Services >> Select to Book feature.
You can also setup your Availability Calendar to start accepting bookings from your customers.
To setup your Services or Products' portfolio to enable your customers or audience to book or buy your Services and/or Products, follow the tutorial on Verber Services and tutorial on Verber Products.
3.5 Feedback
We would love to hear your feedback on this tutorial. Please send us your feedback or any questions using the contact form.
FAQs
Q1: Whose name will be listed with the transaction on a customer's credit card statement?
A: Both VERBER.ME and your (Service provider/Creator) name. You can also add your own custom text to the transaction via the Payments Setup/Update button in your Verber Dashboard.
Q2: Who should customers contact if they have a dispute or complaint?
A: You, as the service provider, assume the responsibility to respond to complaints or resolve disputes.
Q3: If a customer pays in one currency and I accept in a different currency, how does it work?
A: The Payment to you (i.e. Verber User) is made in the currency according to your registered bank account (i.e. the bank account you registered during Verber Payments Setup with Stripe). The Charge to the Customer is made in their local currency. Any currency conversion involved is handled by Verber Payments backend provider (Stripe).
Q4: I have a problem that's not addressed in the FAQs above, how do I contact Verber support?
A: You can send us your issue/question using the contact form.