2. Verber Dashboard
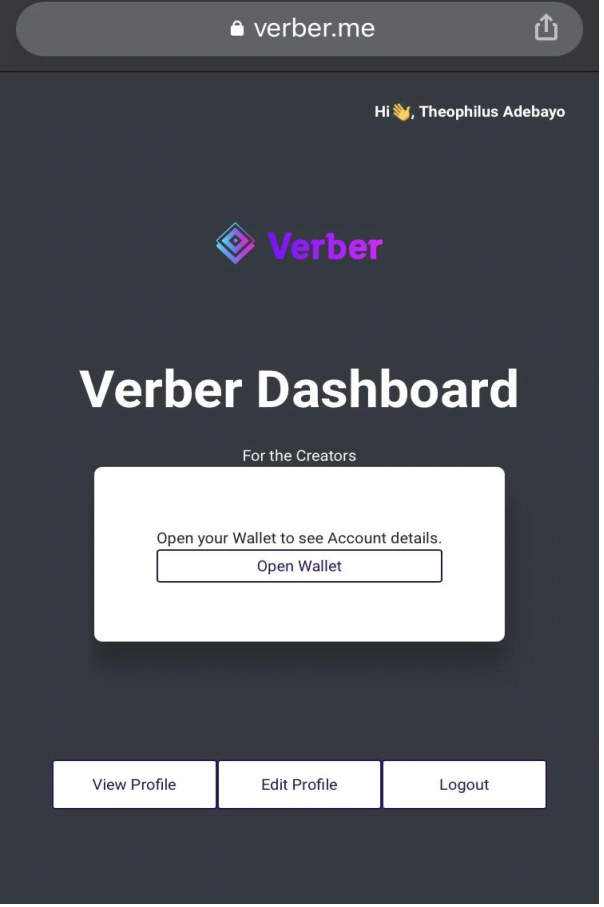
Verber Dashboard - your complete view into your Verber experience!
Setup/Edit your profile, Access your Wallet, send/receive payments and more from your Verber Dashboard
Immediately after you create your verber account you will be directed to your personal dashboard page and you would be given a free Ethereum wallet with which you can use to send and receive payments from your audience and clients all over the globe. But, as with any other social media/marketing network, you would need to establish your verber profile first in order to use its benefits and generate more sales through the platform. As a result, the first thing we recommend you do is to change your profile picture. You may submit a profile photo, create or amend your availability calendar, and link your verber account to all of your social networks handles under profile settings, allowing your audience, clients, or customers to easily find you.

2.1 Upload/Update profile picture
After successfully creating your verber account, the following steps outline how you can go about setting up your verber account professionally.
Enjoy our video tutorial if that's your preferred way to learn!
If you prefer steps described in text, keep scrolling to read:
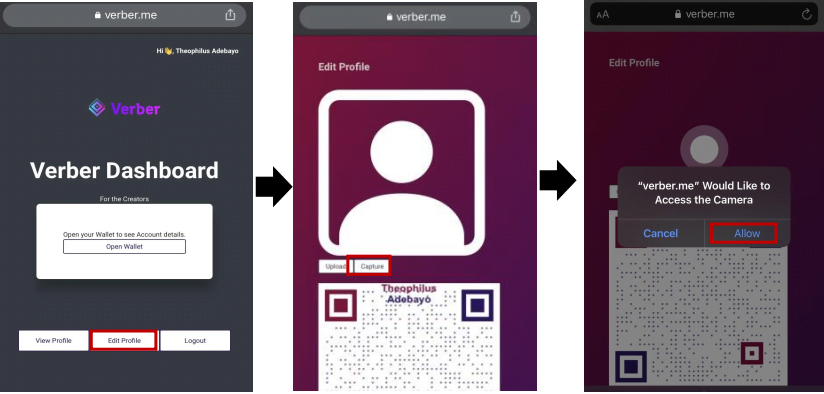
Upload a profile picture In order for you to upload/update your profile picture there are two ways. You can choose from a picture from your library or you capture an instant picture using your device (phone/laptop) camera. Let us begin with the first method.
Upload from library
- On your Verber Dashboard click on
Edit Profilethen you would be directed to your profile page. - In the picture section click on
upload. - A pop-up showing files on your computer will appear.
- Go to your picture folder and select a picture you want to use and click
open. - Your selected picture would be opened and you can resize and adjust the picture to how you want it to be.
- Click on
okayonce you’re done and your picture would be uploaded.

Capture Using on Screen Camera
- On your Verber Dashboard click on
Edit Profilethen you would be directed to your profile page. - In the picture section click on
capture. - A pop up asking for access to your device camera would appear click on
allow. - Set the camera correctly to clearly show your face.
- Click on
captureonce you have set the camera correctly and your face is clearly visible. - Resize and adjust the picture to the center of your face or however you like.
- Click on
okayonce you’re done and your picture would be uploaded.

2.2 Link your social media profile URLs
As creators, influencers, freelancers, designers, students, instructuros, and so on, we all have different social media accounts that we utilize to reach out to our audiences and advertise our products and abilities. Verber allows access to all of these social networking channels in one spot. So, if your audience or customers can't reach you through one channel, they may be able to reach you through another. With Verber, you can share your QR code with your audience and clients via social media, and they can then scan the QR code to reach your verber profile page, where they can make payments or plan a meeting based on your availability schedule.
Enjoy our video tutorial if that's your preferred way to learn!
If you prefer steps described in text, keep scrolling to read:
Here are the steps to follow in linking verber to your social media accounts.
- On your Verber Dashboard click on
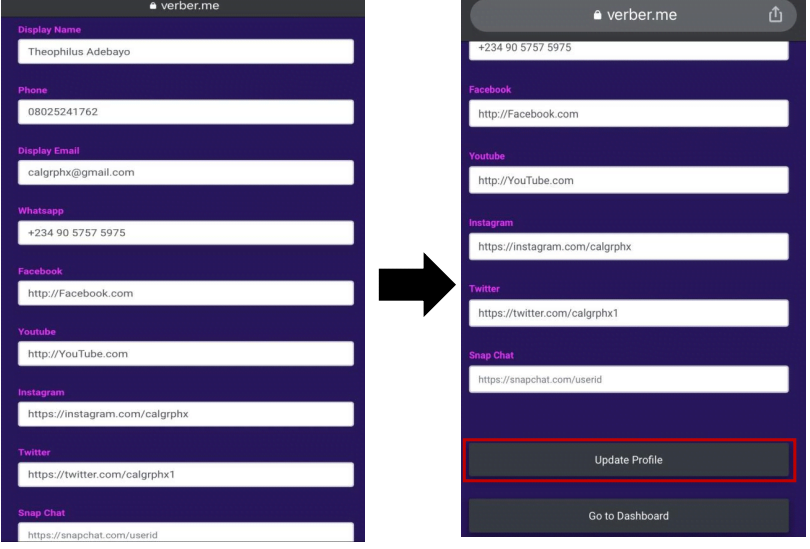
Edit Profilethen you would be directed to your profile page. - Scroll down to where you are requested to input your social media URLs.
- Click on each field (e.g Facebook) and input your account URL as shown in the image below.
- For the field named
Display Name, note the following details:
- Display Name be changed anytime.
- Display Name can be different from the First Name and Last Name that you entered while signing up on Verber (the First Name and Last Name, as noted in the previous tutorial, can't be edited afterwards)
- Repeat the same process for your other accounts you wish to link.
- Once you are done click on
Update Profileand your information would be saved.
Note: In order to get your social media URL there is a video on how to do that. Scroll down and check the video to learn.

To setup your Payments account to receive payments from your audience, follow the tutorial on Verber Payments.
To setup your Services or Product portfolio for showcasing them to your customers or audience, follow the tutorial on Verber Services and tutorial on Verber Products.
FAQs
Q1: How do I access my Verber Dashboard for the first time?
A: After creating your Verber account, you'll be directed to your personal dashboard page where you can set up your profile and wallet.
Q2: I am having trouble uploading my profile picture. What should I do?
A: Ensure that you have granted the necessary permissions to your browser or app to access your photos or camera. Follow the troubleshooting steps in the 2.1 Upload/Update profile picture section agove, or watch the video tutorial linked therein for additional guidance.
Q3: Can I change my display name on my Verber profile?
A: Yes, the Display Name on your Verber profile can be changed at any time and can be different from the First Name and Last Name you entered while signing up. However, remember that your First Name and Last Name cannot be edited after signup. For more details, refer to the instructions under 2.2 Link your social media profile URLs.
Q4: I have a problem that's not addressed in the FAQs above, how do I contact Verber support?
A: You can send us your issue/question using the contact form.